Cable harness assembly is the controlled manufacturing process of turning wires, terminals, connectors, labels, sleeves, and drawings into a finished electrical interconnect system. For OEM buyers, the most important question is not only “what is a cable harness?” It is “can this supplier build the harness consistently, test it correctly, and document it well enough for production?”
Order custom cable harness assemblies
soulin manufactures wire harness and cable assembly products for OEM equipment, using specified connectors, wires, labels, sleeving, and test requirements.
This guide explains the complete cable harness assembly process from RFQ review to delivery. It also shows what information buyers should send before quoting, what happens during wire cutting and crimping, how harness boards are used, which inspections matter, and how to avoid common defects.
If you are sourcing a custom cable harness, the fastest path is to send the drawing, BOM, connector part numbers, wire specifications, quantity, test requirements, and application environment. With those details, soulin can review manufacturability and prepare a more accurate quotation.
Quick Answer: What Is the Cable Harness Assembly Process?
The cable harness assembly process usually includes specification review, material preparation, wire cutting, wire stripping, terminal crimping, terminal insertion, harness board layout, bundling, labeling, electrical testing, visual inspection, and packaging.
A typical OEM cable harness process looks like this:
- Review the drawing, BOM, connector models, wire gauge, and electrical requirements.
- Confirm manufacturability, replacement options, tolerances, and test requirements.
- Cut wires to length and strip insulation according to the drawing.
- Crimp terminals with controlled tooling and inspect crimp height, pull force, and appearance.
- Insert terminals into connector housings and confirm locking position.
- Build the harness on a harness board or fixture to control branch length, routing, and breakout position.
- Add labels, sleeves, tubes, heat shrink, ties, and protective materials.
- Perform continuity, short-circuit, polarity, and application-specific electrical tests.
- Complete final visual inspection, documentation, and packaging.
For OEM programs, the strongest suppliers treat cable harness assembly as a repeatable manufacturing system, not as manual wiring only.
Buyer and RFQ Checklist for Custom Cable Harness Assembly
Before requesting a quote, prepare as much of the following information as possible. Complete RFQ data helps the supplier reduce assumptions, identify risks early, and quote the correct materials and process time.
| RFQ Item | What to Send | Why It Matters |
|---|---|---|
| Drawing or wiring diagram | PDF, CAD drawing, pinout table, or marked sample | Defines wire routing, pin assignment, length, branches, labels, and tolerances |
| BOM | Connector, terminal, wire, sleeve, tube, label, tie, and accessory part numbers | Controls material selection, sourcing time, and substitution review |
| Connector details | Brand, series, part number, male/female, pitch, lock type, waterproof rating | Prevents mating mismatch and terminal compatibility problems |
| Wire specification | AWG or mm2, insulation material, color, rating, shielding, jacket | Affects current capacity, flexibility, stripping, crimping, and environment fit |
| Quantity | Prototype quantity, pilot run, annual volume, delivery schedule | Determines tooling approach, unit cost, and production planning |
| Application environment | Automotive, industrial, medical, consumer, outdoor, vibration, heat, oil, moisture | Guides connector, jacket, sleeve, strain relief, and testing choices |
| Test requirements | Continuity, hi-pot, insulation resistance, pull-force, custom fixture test | Defines quality control steps and test fixture needs |
| Samples or photos | Existing harness sample, connector photos, installed-space photos | Helps confirm routing, breakout direction, clearance, and assembly constraints |
| Packaging requirements | Bags, labels, lot traceability, kitting, cartons, ESD handling | Protects parts during shipping and supports receiving inspection |
| Compliance needs | RoHS, REACH, UL-recognized materials, customer-specific requirements | Ensures material and documentation alignment before production |
If you do not have a complete drawing yet, send a sample, photos, connector information, and the function of each wire. soulin can help review the structure and suggest the missing details needed for quotation.

Wire Harness Assembly Process Table
The table below summarizes the main production steps for OEM cable harness manufacturing.
| Process Step | What Happens | Key Control Points | Typical Output |
|---|---|---|---|
| 1. RFQ and specification review | Supplier checks drawing, BOM, pinout, test needs, and application environment | Missing dimensions, terminal compatibility, wire gauge, substitutions, tolerances | Quote basis and engineering questions |
| 2. DFM and sample confirmation | Manufacturing team reviews whether the harness can be built efficiently and tested reliably | Bend radius, branch length, connector orientation, label position, fixture feasibility | Confirmed build method or DFM feedback |
| 3. Material preparation | Connectors, terminals, wires, sleeves, labels, tubes, and accessories are prepared | Approved parts, correct colors, correct wire size, incoming inspection | Ready materials for production |
| 4. Wire cutting | Wires are cut to specified length using manual or automated equipment | Cut length tolerance, wire color, batch separation, quantity count | Cut wire sets |
| 5. Wire stripping | Insulation is stripped from wire ends to expose conductor for crimping or soldering | Strip length, no nicked strands, no damaged insulation | Prepared wire ends |
| 6. Terminal crimping | Terminals are attached to stripped wire using controlled crimp tooling | Crimp height, conductor brush, insulation support, pull-force, tooling condition | Crimped wire leads |
| 7. Terminal insertion | Crimped terminals are inserted into connector housings according to pinout | Correct cavity, terminal lock, insertion direction, tug test | Populated connectors |
| 8. Harness board assembly | Wires are routed on a fixture or board to control branch shape and length | Branch length, breakout point, connector orientation, bend radius | Harness shape matches drawing |
| 9. Bundling and protection | Tape, braided sleeve, corrugated tube, heat shrink, tie wraps, or jackets are applied | Coverage, strain relief, abrasion protection, flexibility | Protected harness assembly |
| 10. Labeling and documentation | Labels, part numbers, serials, date codes, and inspection records are added | Label content, position, durability, traceability | Identifiable and traceable harness |
| 11. Electrical testing | Harness is tested for continuity, shorts, polarity, and custom requirements | Test fixture setup, pin-to-pin map, pass/fail record | Verified electrical function |
| 12. Final inspection and packaging | Visual checks, dimensional checks, cleaning, bagging, and cartons are completed | Defects, missing accessories, connector damage, packing protection | Ready-to-ship cable harnesses |
This process may be adjusted for simple jumper cables, complex automotive harnesses, medical device cables, industrial control harnesses, waterproof cable assemblies, or mixed connector assemblies.
Materials and Connector Selection
Material selection has a direct effect on electrical performance, durability, cost, and lead time. For custom cable harness assembly, the main materials include wires, terminals, connector housings, seals, sleeves, jackets, labels, heat shrink, tapes, and protective tubes.
Wire selection
Choose wire based on current, voltage, flexibility, temperature, space, and application environment. Common buyer inputs include:
- AWG or cross-section size
- Conductor material and strand count
- Insulation material
- Wire color
- Rated voltage and temperature
- Shielded or unshielded structure
- Single wire, ribbon cable, multi-core cable, coaxial cable, or twisted pair
For applications with repeated movement, vibration, or tight routing, flexibility and bend radius matter as much as electrical rating.
Connector and terminal selection
Connector selection should start from the mating interface and environment:
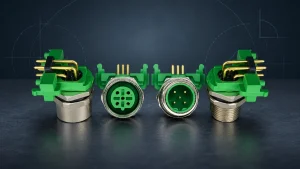
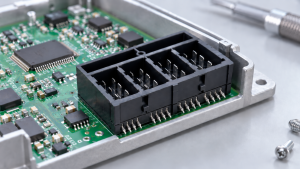
- Board-to-wire connectors for PCB connection
- Wire-to-wire connectors for internal harness routing
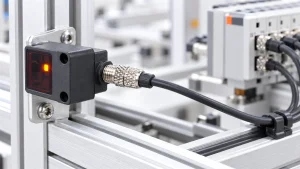
- Circular connectors for industrial equipment
- Waterproof connectors for outdoor or harsh environments
- FFC/FPC connectors for compact electronics
- RJ45, M12, USB, D-sub, or other interface connectors where required by the device
The terminal must match the connector housing and wire size range. A connector part number alone is not always enough. The terminal series, plating, wire range, seal compatibility, and crimp tooling should also be checked.
Protective materials
Protective materials are selected according to abrasion, heat, chemical exposure, installation space, and appearance requirements:
- PVC tube for simple bundling
- Corrugated tube for mechanical protection
- Braided sleeve for abrasion resistance and flexibility
- Heat shrink tube for insulation, strain relief, and branch protection
- Adhesive-lined heat shrink for moisture resistance
- Tape wrapping for routing and noise reduction
- Labels for part identification and installation guidance
When the harness will be installed near motors, engines, metal edges, or moving parts, protection should be reviewed early instead of added after sample failure.

Crimping and Terminal Insertion
Crimping is one of the most important steps in cable harness assembly. A good crimp creates a stable mechanical and electrical connection between the conductor and terminal without cutting strands, leaving loose wires, or damaging insulation.
What a good crimp should control
A controlled crimp process checks:
- Correct terminal and wire size
- Correct strip length
- Proper conductor placement
- Proper insulation support
- No missing or cut strands
- No over-crimping or under-crimping
- Correct crimp height where specified
- Pull-force result where required
- Clean terminal shape without deformation that blocks insertion
For production projects, crimping should be done with the correct applicator or tooling, and the first pieces should be inspected before the batch continues.
Terminal insertion into connector housings
After crimping, terminals are inserted into connector housings according to the pinout. This step must prevent wrong-cavity insertion, incomplete locking, bent terminals, and reversed connector orientation.
Common checks include:
- Pin number verification against drawing
- Visual confirmation of terminal orientation
- Audible or tactile lock confirmation where applicable
- Light tug test after insertion
- Secondary lock or TPA installation where the connector uses one
- Final pin-to-pin continuity test
Many harness failures come from terminals that look inserted but are not fully locked. This is why terminal insertion must be verified before final bundling hides the wires.

Harness Board Assembly and Routing Control
A harness board, also called a nail board or assembly fixture, helps control the physical shape of the wire harness. It guides operators on wire routing, branch position, connector direction, overall length, and accessory placement.
Harness boards are especially useful when the assembly includes:
- Multiple branches
- Several connector types
- Fixed breakout points
- Tight installation spaces
- Repeated production quantities
- Labels, clips, sleeves, or protective tubes at defined positions
During harness board assembly, wires are routed along the fixture, grouped into branches, and secured with tape, ties, sleeves, or tubing. The board helps keep the finished harness consistent from one unit to the next.
For OEM buyers, a harness board is also a sign that the supplier has translated the drawing into a repeatable build method. This matters when moving from prototype to mass production.
Labeling, Documentation and Traceability
Labels and documentation make the finished cable harness easier to install, inspect, replace, and trace. For OEM production, this is more than cosmetic. It reduces installation mistakes and helps quality teams identify batch information.
Common labeling and documentation items include:
- Part number label
- Revision label
- Wire number label
- Connector position label
- Date code
- Lot number
- Serial number where required
- Pass/fail test record
- Inspection report
- Packing label
Label material should match the environment. A label used inside a dry device enclosure may not need the same durability as a label exposed to oil, heat, water, or outdoor conditions.
Documentation requirements should be discussed during the RFQ stage. If the buyer needs a test report, material declaration, photo record, or first article inspection, the supplier should know this before production begins.

Testing and Quality Control for Cable Harness Assembly
Testing confirms that the cable harness matches the electrical design before shipment. The exact test plan depends on the product, application, and buyer requirements.
Common electrical tests
| Test Type | What It Checks | Why It Matters |
|---|---|---|
| Continuity test | Confirms each wire connects to the correct pin | Prevents open circuits and wrong wiring |
| Short-circuit test | Checks that unintended connections are not present | Prevents device damage and safety risks |
| Polarity test | Confirms positive, negative, signal, and ground lines are in the correct positions | Prevents reverse wiring and functional failure |
| Hi-pot test | Applies high voltage where required to check insulation withstand | Used for higher-voltage or safety-critical assemblies |
| Insulation resistance test | Checks resistance between isolated circuits | Helps identify insulation weakness or contamination |
| Pull-force test | Measures crimp retention force | Confirms terminal crimp strength |
| Visual inspection | Checks physical defects, labels, damage, and completeness | Catches issues that electrical tests may miss |
Visual and process inspections
Quality control should also include physical inspection:
- Correct wire color and gauge
- Correct connector orientation
- Correct terminal insertion
- No exposed conductor outside the terminal area
- No damaged insulation
- No bent pins
- No missing seals, locks, sleeves, labels, or accessories
- Correct branch length and harness shape
- Clean packaging without crushing connectors
For complex harnesses, a dedicated test fixture can reduce manual checking errors and provide a clearer pass/fail record.
Common Cable Harness Defects and How to Prevent Them
| Defect | Likely Cause | Prevention Method |
|---|---|---|
| Open circuit | Broken conductor, missed crimp, terminal not fully seated | Continuity test, tug test, controlled terminal insertion |
| Short circuit | Wrong wiring, damaged insulation, exposed strands | Pinout verification, strip-length control, visual inspection |
| Wrong pinout | Terminal inserted into wrong cavity | Color-coded work instructions, pin map, electrical test fixture |
| Weak crimp | Wrong tooling, incorrect crimp height, wrong wire size | Tooling setup, first-piece inspection, pull-force testing |
| Over-crimped terminal | Excessive compression or wrong applicator | Crimp height control and tooling maintenance |
| Damaged insulation | Incorrect stripping blade, handling damage, sharp routing edge | Strip machine setup, operator training, routing protection |
| Loose terminal | Incomplete lock, wrong terminal, missing secondary lock | Terminal compatibility check, tug test, lock verification |
| Connector mismatch | Incorrect connector series or gender | BOM review, mating sample check, incoming inspection |
| Label missing or unreadable | Label process not defined, wrong label material | Label checklist, durable material selection, final inspection |
| Harness too short or branch off-position | Drawing tolerance unclear, no harness board | Fixture build, length inspection, drawing clarification |
| Poor strain relief | Sleeve, tie, or boot missing near stress point | DFM review and protective accessory placement |
| Packaging damage | Connectors not protected during shipping | Individual bagging, caps, trays, carton support |
Preventing these defects starts before production. A complete drawing, clear pinout, approved materials, and defined inspection plan will reduce rework and delivery risk.
How to Request a Quote for Custom Cable Harness Assembly
To request a reliable quote, send soulin the information that defines the harness electrically, mechanically, and commercially.
Minimum information for quotation
Please send:
- Drawing, wiring diagram, or sample photo
- Connector part numbers or connector photos
- Wire gauge, color, length, and insulation requirement
- Pinout or circuit map
- Quantity for prototype and production
- Application environment
- Required tests
- Required labels, packaging, or traceability
- Target lead time
Better information for faster quoting
For a faster and more accurate quotation, also include:
- BOM with approved manufacturers
- 2D or 3D drawing
- Existing sample harness
- Mating connector or device information
- Installation-space photos
- Compliance requirements
- Annual usage estimate
- Delivery schedule by batch
What soulin can help review
soulin can support custom cable harness projects by reviewing:
- Connector and terminal compatibility
- Wire gauge and material selection
- Harness routing and branch layout
- Crimping and terminal insertion process
- Labeling and documentation requirements
- Continuity and custom test requirements
- Prototype-to-production manufacturability
Send your drawing, BOM, or sample information to request an OEM cable harness assembly quote.
Turn your drawing into a production harness
Send wire gauge, connector model, length, labels, samples, test requirements, and quantity for a product quotation.
FAQ
Cable Harness Assembly: RFQ and Production Review
A cable harness assembly should be reviewed from drawing and BOM through wire cutting, stripping, crimping, connector insertion, labeling, continuity testing, inspection, packaging and delivery control.
Sourcing next step
- wire-to-board connector options for harness projects: Use this category when the harness connects to PCB headers, sockets or compact internal interfaces.
- waterproof circular connector options: Review sealed circular interfaces when the harness is used outdoors or in industrial environments.
- custom cable harness connector review: Send drawings, samples or old part numbers when the harness needs replacement matching or OEM/ODM support.
Engineering checklist before RFQ
- Send the harness drawing, wire specification, connector part numbers, pinout, labels and quantity target for RFQ review.
- Confirm crimp terminals, pull-test requirements, continuity test rules and any waterproof or shielding needs.
- Review packaging, cable bend protection and lot traceability before repeat production.